
Getting Your Bicycle Ready For Spring:

Introduction:
Blue skies and warm weather are the perfect combo for bicycle riding. It's time to get your bike out of storage but before you venture onto the road or trail, give it a quick once over to assess it's overall condition.
Obvious issues like flat tires, broken seats, and bent rims will require repair, but general maintenance should only take a few minutes. First you'll want to give your bike a good washing by simply hosing it down to remove dirt and mud. Then you can dive deeper into the underlaying health of your bike and evaluate what it really needs. Use this checklist and you'll be headed for a trouble free season of happy pedaling.
Check and Adjust your Saddle:

Carefully examine your saddle for damage and unwelcome guests, tighten and adjust your bike seat before using it for the first time. A loose seat can lead to trouble and an uncomfortable ride as can a saddle which has become tipped from level.
If the seat cover is worn out, the rails compromised, or the shell damaged or cracked, then replace your seat immediately. A damaged saddle can be dangerous as well as noisy and uncomfortable. Remember to check your saddle height and for/aft adjustment to maintain a correct fit. Finally give your seat a firm twist to make sure that your seat clamp is sufficiently tight.
Check Your Tire Pressure
All bikes tires lose air pressure over time, so it's likely you'll need to add air before your first spring ride. Invest in a quality air pump with a wide base to stand on, and large easy to read gauges. Try not to exceed the tire manufacturer's recommended maximum pressure, maximum preasures are embossed on the side of the tire. Finally, check your tires for obvious damage like rips or tears as well as the decay that can develop when they are stored near electric motors or other devices which emit ozone.
 |
All tires lose pressure over time....Click Here for more information on selecting the correct tire pressure: |
| ....Manufacturers note your tire's maximum pressure on the sidewall of the tire.... |  |
 |
Bicycle tubes come with two types of valve |
| Get a pump with a large, easily read guage |  |
 |
It is helpful to get a pump with a "Smart Head" which will automatically adapt to either type of valve. |
| Don't forget to check your tires for damage. | 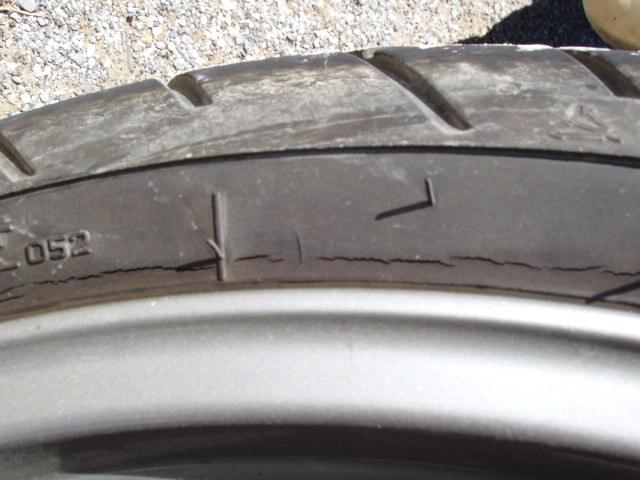 |
Check Your Shifting and Shifters:

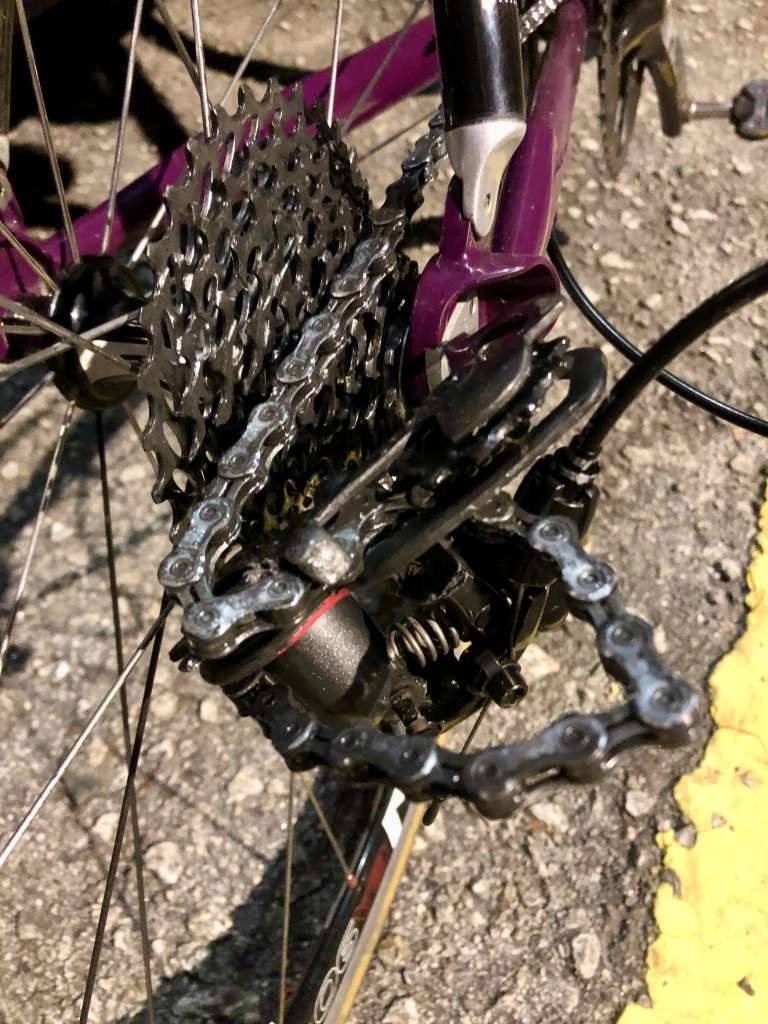
You’ll want to know that your gears are shifting smoothly before you head off for a Springtime cycle. If your bike hasn’t been used in a long time, then it’s possible that your derailleur needs adjusting. Using a bike stand, or hang your bike upside down and spin the pedals to run through the gears and check that they shift correctly. If you do need to adjust your front and rear derailleurs slightly, you can do this quite easily with a Philips-head screwdriver. If you are uncomfortable making this adjustmen yourself, it is something the Mechanics at Lakeside Bicycles can handle in a few minutes, usually while you wait.

Be careful when shifting the rear shifter toward the spokes. It is possible that, unbeknownst to you your bicycle may have been knocked to it's side bending the rear derailleur hanger or the limit screws may simply have come out of adjustment, in any case shifting into the spokes is a major cause of springtime rear wheel and derailleur replacements.
Check Your Brakes and Brake Levers:
A safe ride is going to depend on being able to stop in a controlled and orderly fashion, and how do we do this? Brakes baby.

Start out by checking that your brakes are soundly attached to your bike. It may seem obvious, but nothing interrupts a ride like a brake calliper which has suddenly come lose. Next check cables or hydraulic hose for damage. In the event of damage or, in the case of cables, rust, the offending components should be replaced prior to riding. Follow up by making sure that your brakes actuate properly without rub or excessive play in the lever.
In the case of rim brakes and cable actuated disc brakes, cable pull can be adjusted simply by rotating the Barrel Adjuster to take up slack or loosening the Cable Clamp, pulling slack through it and then re-tightening. The Quick Release tab (located on the caliper for most and on the brake lever for Campagnolo) is for easing wheel removal and is not an adjustment. Adjusting lever pull in hydraulic brakes is a complex task. Unless you are experienced and well educated in the maintenance of your specific braking system it is almost always best left to professionals. In any case your brake levers and brakes should function smoothly both when actuating your brakes and when releasing them. In the event they do not, this is another adjustment best left to professionals.

Finally you will need to check your brake pads for wear and proper alignment. In extreme cases worn brake pads will not only compromise braking, they can also do permanent damage to your bicycle. In any case, brake pad replacement is generaly best left to professionals. Properly aligned brake pads should land squarly on the braking surface without extending above or below and should function without squealing......

You know what? Unless you know what you are doing (in which case you are reading this page for amusement rather than education any way) major adjustments to your brakes should be carried out by the mechanics at Lakeside Bicycles. Baring that, other bike shops will probably do.
...
Check Your Chain for Wear:
A worn chain will quickly wear the rest of your drive train to match. While this can keep everything running smoothly for quite a while, eventually you are going to need to replace one part or another, and then? Woe unto you for you will likely now quickly find that your entire drive train is now junk. While volumes have been devoted to the care and feeding of bicycle drive trains, we are going limit ourselves to addressing the spring ritual of checking your chain for wear.

While there are an abundance of specialized tools designed for this task, the simplest method is to take a 12 inch ruler and align the "0" hash to one chain rivit and then check to see where the 12" hash lands. If it falls 1/8" or more behind the rivit, you need a new chain. That easy.
Wheels:

Each part of your wheels should be examined. Your quick releases should be tight enough to resist opening and, when closing, should engage at 90o and leave an impression on your palm. Next check the bearing adjustment. grasp the tire and gently rocking your wheel back and forth perpendicular to spin. If there is play, your bearings are too loose. Now spin the wheel while gently grasping the quick release. If you feel roughness then either your bearings are too tight or they need to be cleaned and re-packed.

Carefully examine each rim for cracks, particularly at the spoke holes and for brake wear. The braking surface should be uniform and flat. Now check spoke tension by squeezing pairs of spokes. Spoke tension should be uniform across each side of the wheel. A quick spin of each wheel to check for trueness (side to side) and roundness (up and down) and your wheels are done.

Frame, Bearings and Accessories:

Check your frame for corrosion, cracks or other damage. Make sure your headset is neither loose nor too tight, the same for your pedal bearings. Finally go through your emergency accessories. Make sure your spare tube is the correct model for your wheels and that it holds air. Check you patch kit to make sure the glue hasn't dried out. Make sure that your pump is working or that your CO2 cartridges the correct volume for your tires and that they are un-used. Make sure that you have a pair of functional tire irons and a $20 bill is not only a good idea but, in an emergencie, makes an excellent if expensive boot for tire cuts
In general most of the problems for which you are checking are going to require a qualified mechanic to correct. As a consequence we recommend you go over your bike at least a couple of weeks before your first, spring ride in order to give Lakeside Bicycles plenty of time to bring your trusty steed up to spec. before the big day.
